The DOOCS Requestor Device
The DoocsRequestor device acts as the request gateway for a DOOCS location and properties, whether or not they have been requested already (whether through the same Karabo topic or another). There is one DoocsRequestor device per Karabo topic.
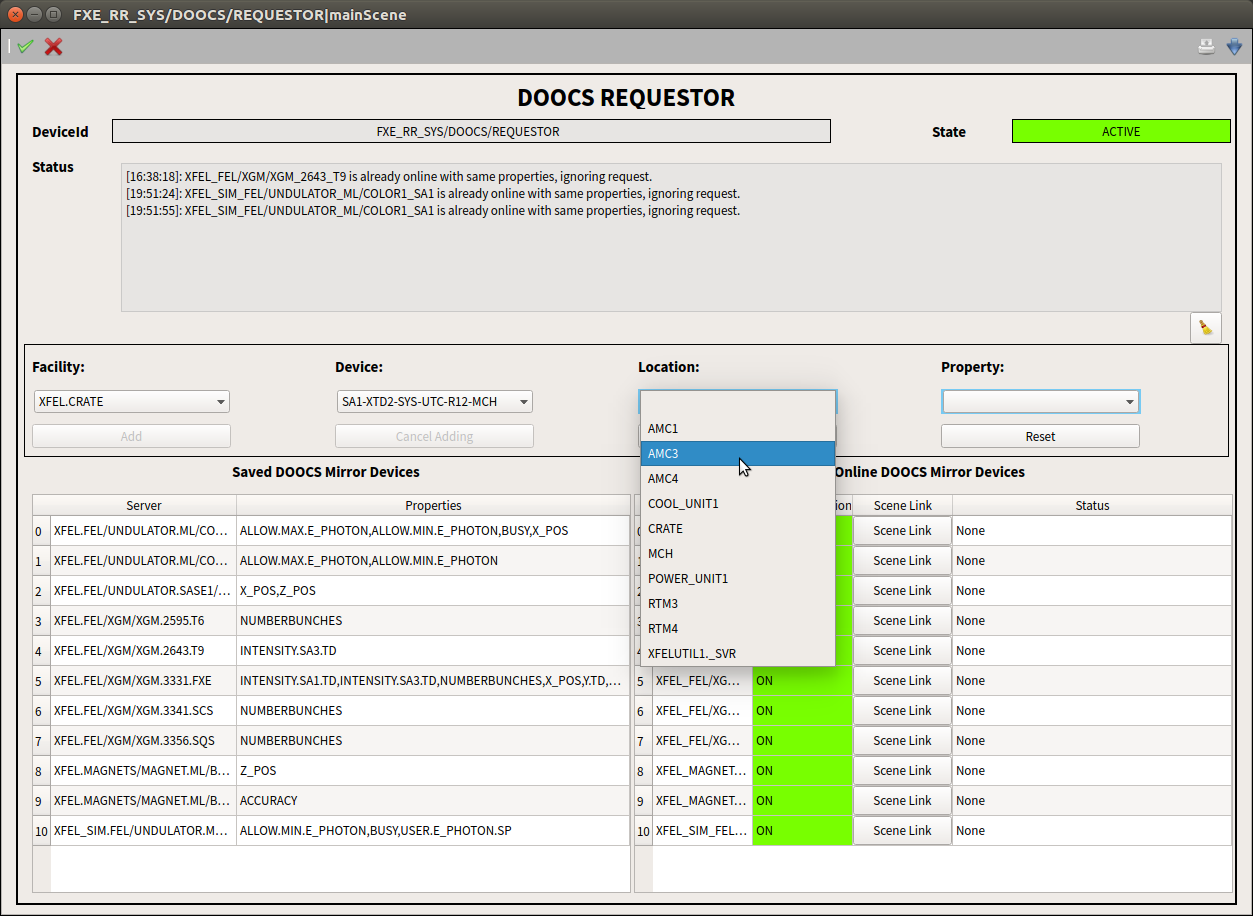
The device provides an overview of the available DOOCS locations. The user can browse through the lists of locations according to the DOOCS nomenclature - first through Facility then Device, Location, and finally Property.
The DoocsRequestor keeps the list of currently “active” requested locations/properties and also the list of locations/properties requested in the past.
After the user has made a request for specific DOOCS location/property an instance of DoocsMirror will be created behind the scenes (or the existing one will be used if the corresponding DOOCS location is already “bridged” in any Karabo topic). DoocsMirror devices act like “bridges” between DOOCS locations and Karabo. They can be added then to the DAQ for storing “bridged” locations/parameters.
Note
There is always a one-to-one correspondence between the requested DOOCS locations and the DoocsMirror devices. Each DoocsMirror represents (“bridges”) only one DOOCS location with a subset of the properties available in the DOOCS location.
This device works with a DoocsManager device behind the scenes.
Instantiation
Normally the DoocsRequestor device is instantiated automatically without the need for the user to instantiate it. There is always only one DoocsRequestor device in the Karabo topic; if you don’t know the exact Karabo project try searching DoocsRequestor in the GUI’s System Topology to find the instantiated device. After instantiation the device should go to the ACTIVE state.
Requesting DOOCS locations and parameters
In order to add locations using the device generated scene:
- Double click on the device in the System Topology or the Projects in the Karabo GUI. The auto-generated scene will appear.
- Choose DOOCS location and property according to the DOOCS nomenclature by specifying through a series of drop-down selections Facility, Device, Location and Property:

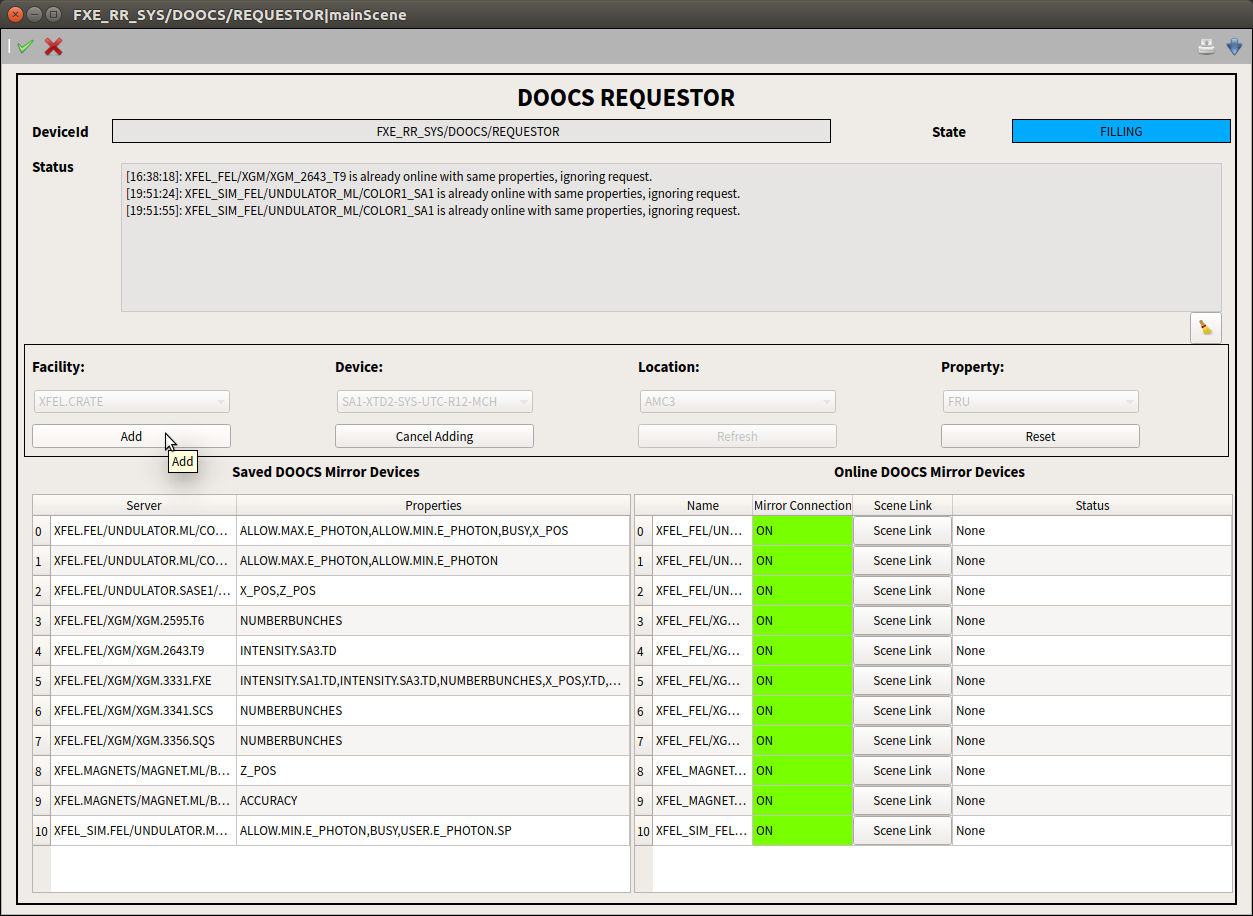
Note that after the selection is made in all of the drop down lists, the device goes to the FILLING state
- Click the ADD button (or click Cancel Adding to cancel):

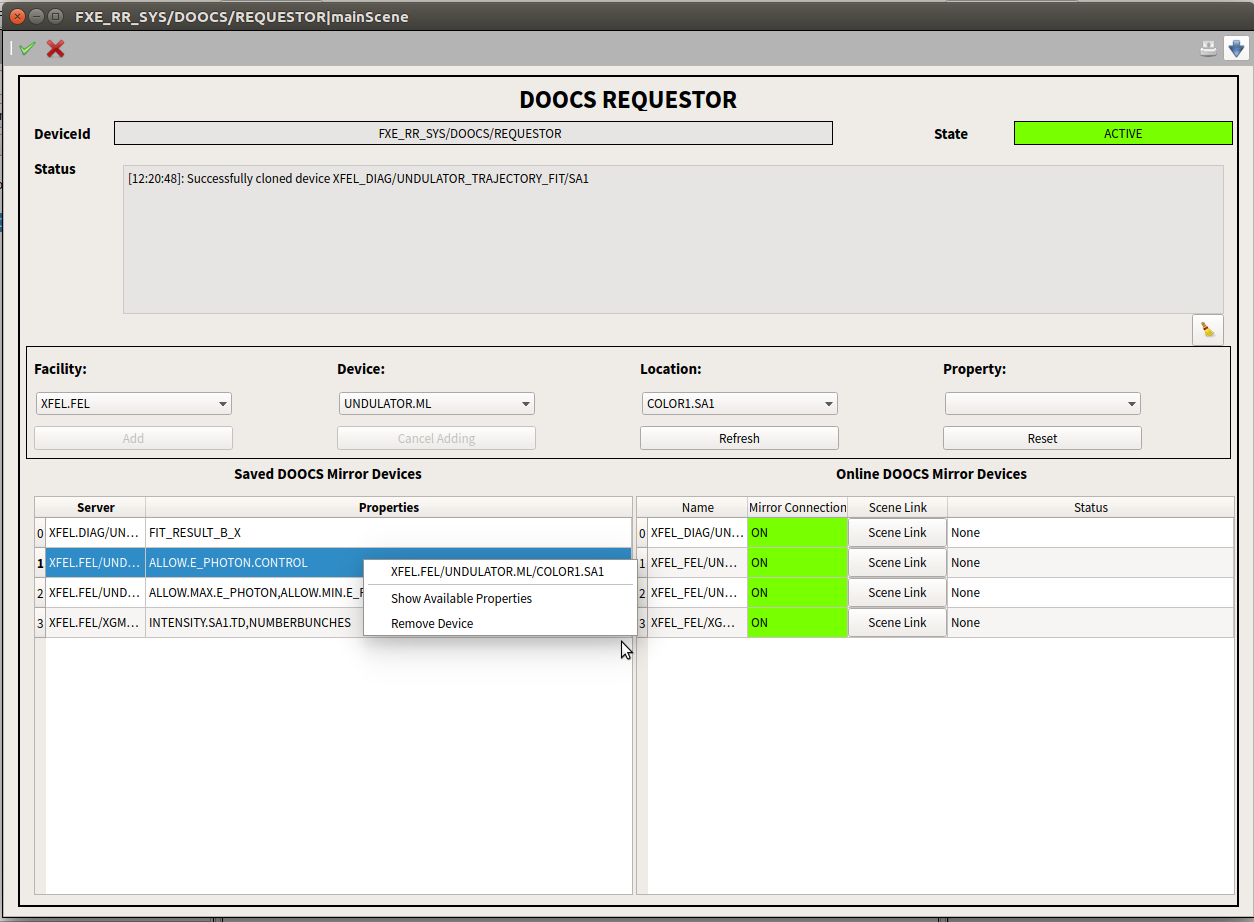
The property specified by the user will be then added to the corresponding DoocsMirror (to the existing one, or a new one will be automatically instantiated). The Location and Property will appear in the Saved DOOCS Mirror Devices widget table on the scene (it corresponds to the table DOOCS Locations in device’s configuration editor):

Adding Location/Property will automatically create a DOOCS Mirror device (or the existing one will be used) which then appears in the Online Doocs Mirror Devices table. Mirror devices are listed with their Karabo name (Name), mirror connection (Mirror Connection, which can be on, error or unknown), link to the mirror’s own scene (Scene Link) and actual status of the mirror device (Status)
Refresh
If in the Online DOOCS Mirror Devices table, some DoocsMirror device is missing for the property/location listed in the Configured Doocs Mirror Devices table, it is possible to instantiate it by clicking the Refresh button.
Resetting the selection
To reset the current selection, click Reset.
Opening the auto-generated scene of the DoocsMirror
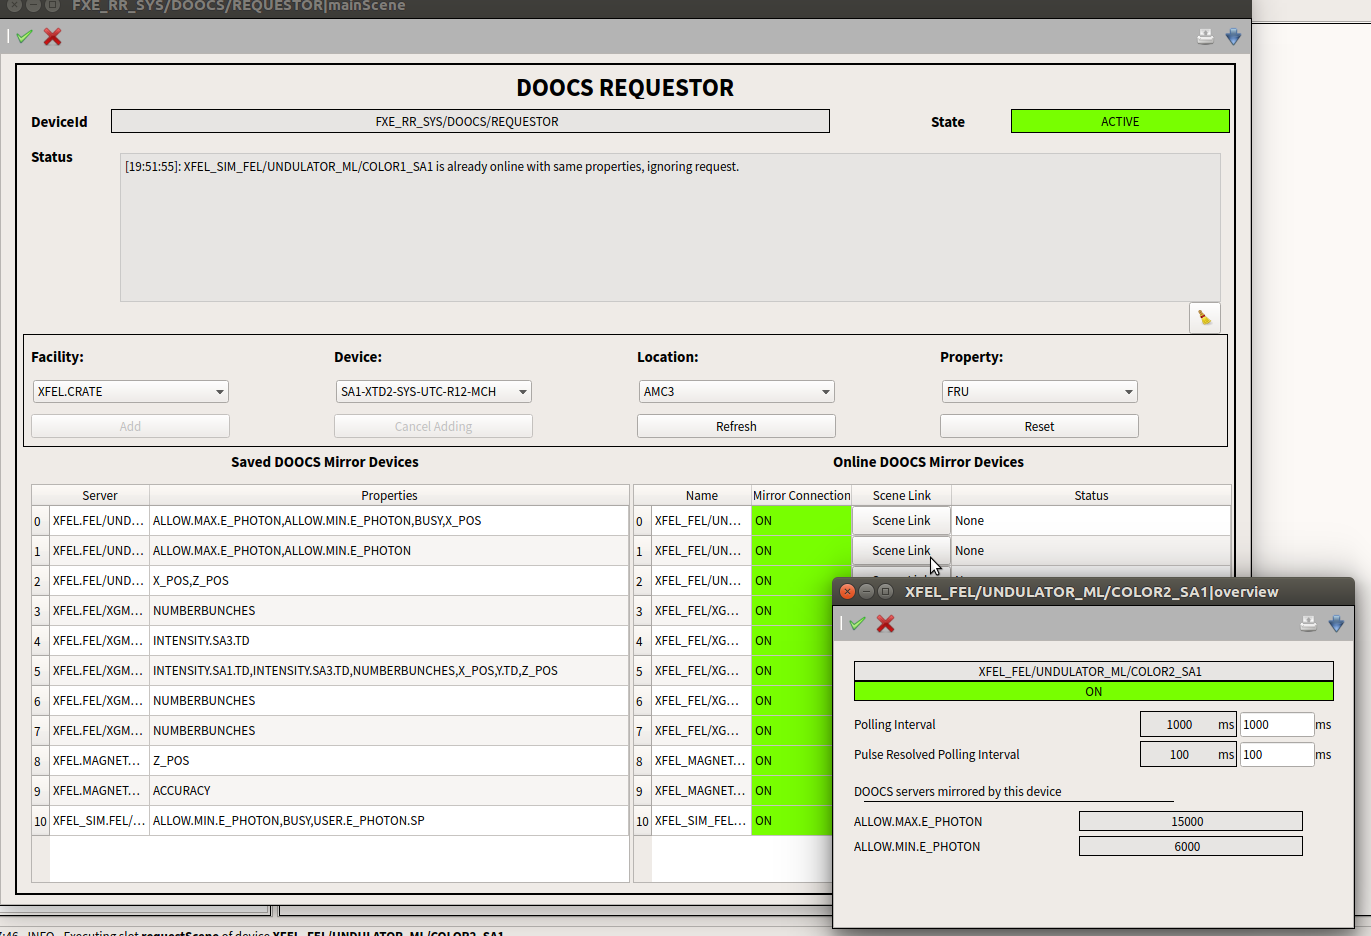
In order to open directly the autogenerated scene of the DoocsMirror, click the corresponding button Scene Link on the table Online DOOCS Mirror devices as shown in figure below:


 .
.