5. FastCCD Data Acquisition
5.1. Online Preview
5.1.1. Raw Preview
The DAQ panel in the Control scene contains a small preview of the raw data acquired by the detector. The gain bits are not processed in this preview, so Medium and Low gain pixels have a very large, arbitrary offset with respect to High gain pixels.
In general you should set the limits of the z axis (color scale) of this preview to 3400 - 4300 ADU (ADC Units).
5.1.2. Corrected Preview
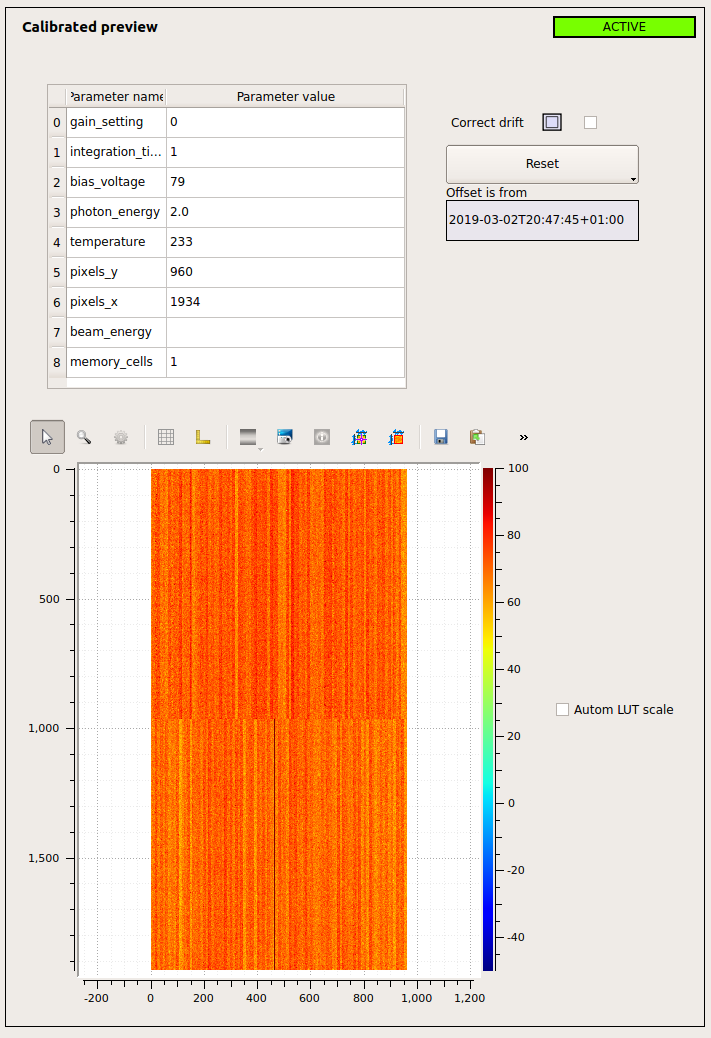
This preview (Fig. 5.2) shows the offset corrected images based on the most recent calibration constants (from dark run) for particular gain and temperature settings of the detector. It is therefore a processed form of the raw data preview.
The calibrated preview is part of the Control Scene (see Fig. 4.2). To update this preview to use the most recent dark runs:
- Process the dark runs (see Section 5.2.1) with high, medium and low gain settings, which adds the most recent calibration constants to the Calibration Database.
- On the Calibrated Preview part of the Control scene, you will see a table with 8 inputs. Change the settings in the table to match the current detector configuration and hit Return twice to commit the changes. Make sure the table does not have a blue edge as that indicates the change is not saved in Karabo. If you see the blue edge around the table, press Return again.
- Click on Reset button and wait for the status to become PASSIVE.
- Click on Init button to initialize the change and wait for the status to become ACTIVE.
- At this point, the output of “Offset is from” field should change to the time the last dark runs were acquired. If it does not make sure that the condition table matches the condition in which the dark runs were acquired.
- Even though the “Offset is from” field is updated, the preview is still based on the previous calibration constants. This is a known bug. You need to press Reset and Init one more time in the correct order to actually update the calibrated preview with the most recent calibration constants.
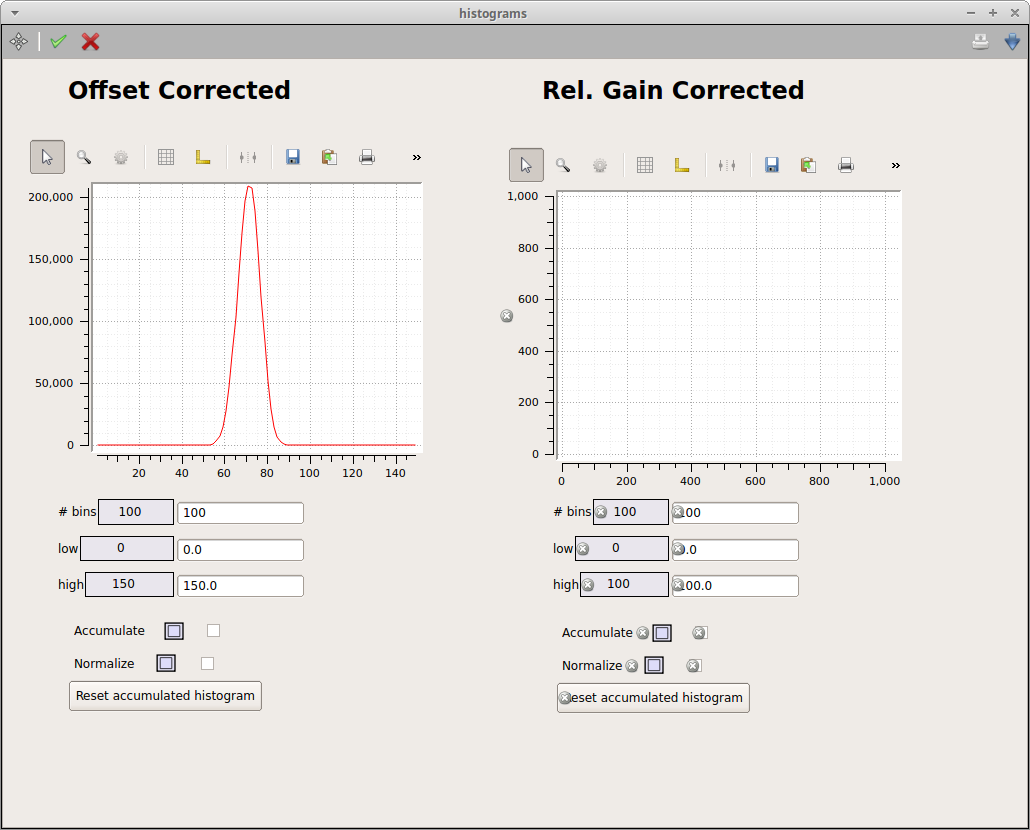
When a recent set of calibration constants has been loaded, the z-axis (color scale) of the image preview (and that of the histograms) should be centered around 0 for the high gain, a reasonable default is min:-100 and max:100 ADU.
If the beam intensity is too high, the preamplifiers of the CCD camera may be saturated. If that is the case, you will see dark red lines (or a dark red region) on the calibrated preview. In this case, ask the SCS beam-line scientists to reduce the intensity.
5.1.3. Preview Histograms
There are two online histograms in the histogram scene in the SCS_CDIDET_FFCD2M_CAL subproject (see Fig. 5.3): both based on calibrated preview described above. In the first one only the offset correction is applied while the second one has the relative gain correction. Due to a known bug if you are using the Low or Medium gain, you will need to adjust the range according to the calibrated preview and ranges.
5.2. Offline Data
5.2.1. Processing Dark Runs
After taking a dark run for each gain setting, log into Metadata Catalog (https://in.xfel.eu/metadata). Click on Proposals link on the top right hand side, then on the current proposal number (if you cannot find the current proposal make sure the SCS beam-line scientists have given you the permission to access it). Open the Runs page; there you should see the run numbers corresponding to the dark runs you just took. It might take a few minutes for the runs to appear on the list (you will need to reload the page manually).
If the dark runs were OK, change the Data Assessment to Good (if you cannot do this step, you do not have the right permissions for this proposal and need to ask a member of the SCS group) and migrate the data run to Maxwell cluster.
To inject the new dark runs, please follow the following steps:
- Wait a few minutes for the data has been migrated to Maxwell.
- Connect to Maxwell:
ssh username@max-exfl- load anaconda:
module load anaconda/3- For each gain/run, execute this command replacing cycle, proposal and run numbers accordingly (you need to have access to the proposal for this step to work):
python /gpfs/exfel/data/scratch/haufs/request_darks.py --instrument SCS --cycle ### --proposal ### --run ###- You can launch multiple instances of the script simultaneously, or cancel it (with
Ctrl+C) after it reports initial feedback (DONE, sometimes truncated toONE). In case you leave it running, it will report feedback on the process.
Once the dark runs are analyzed and the calibration constants are injected into the Calibration Database, you can setup the calibrated preview (see Section 5.1.2) or reprocess acquired data.
5.2.2. Reprocessing Acquired Data
The instructions for the web service based calibration via Metadata Catalog are found at https://in.xfel.eu/readthedocs/docs/detector-documentation/en/doc-lpd_non_lin/calibration/offline_calibration.html.
After the process is over you will find in the proc/ folder of your proposal two files for each raw file:
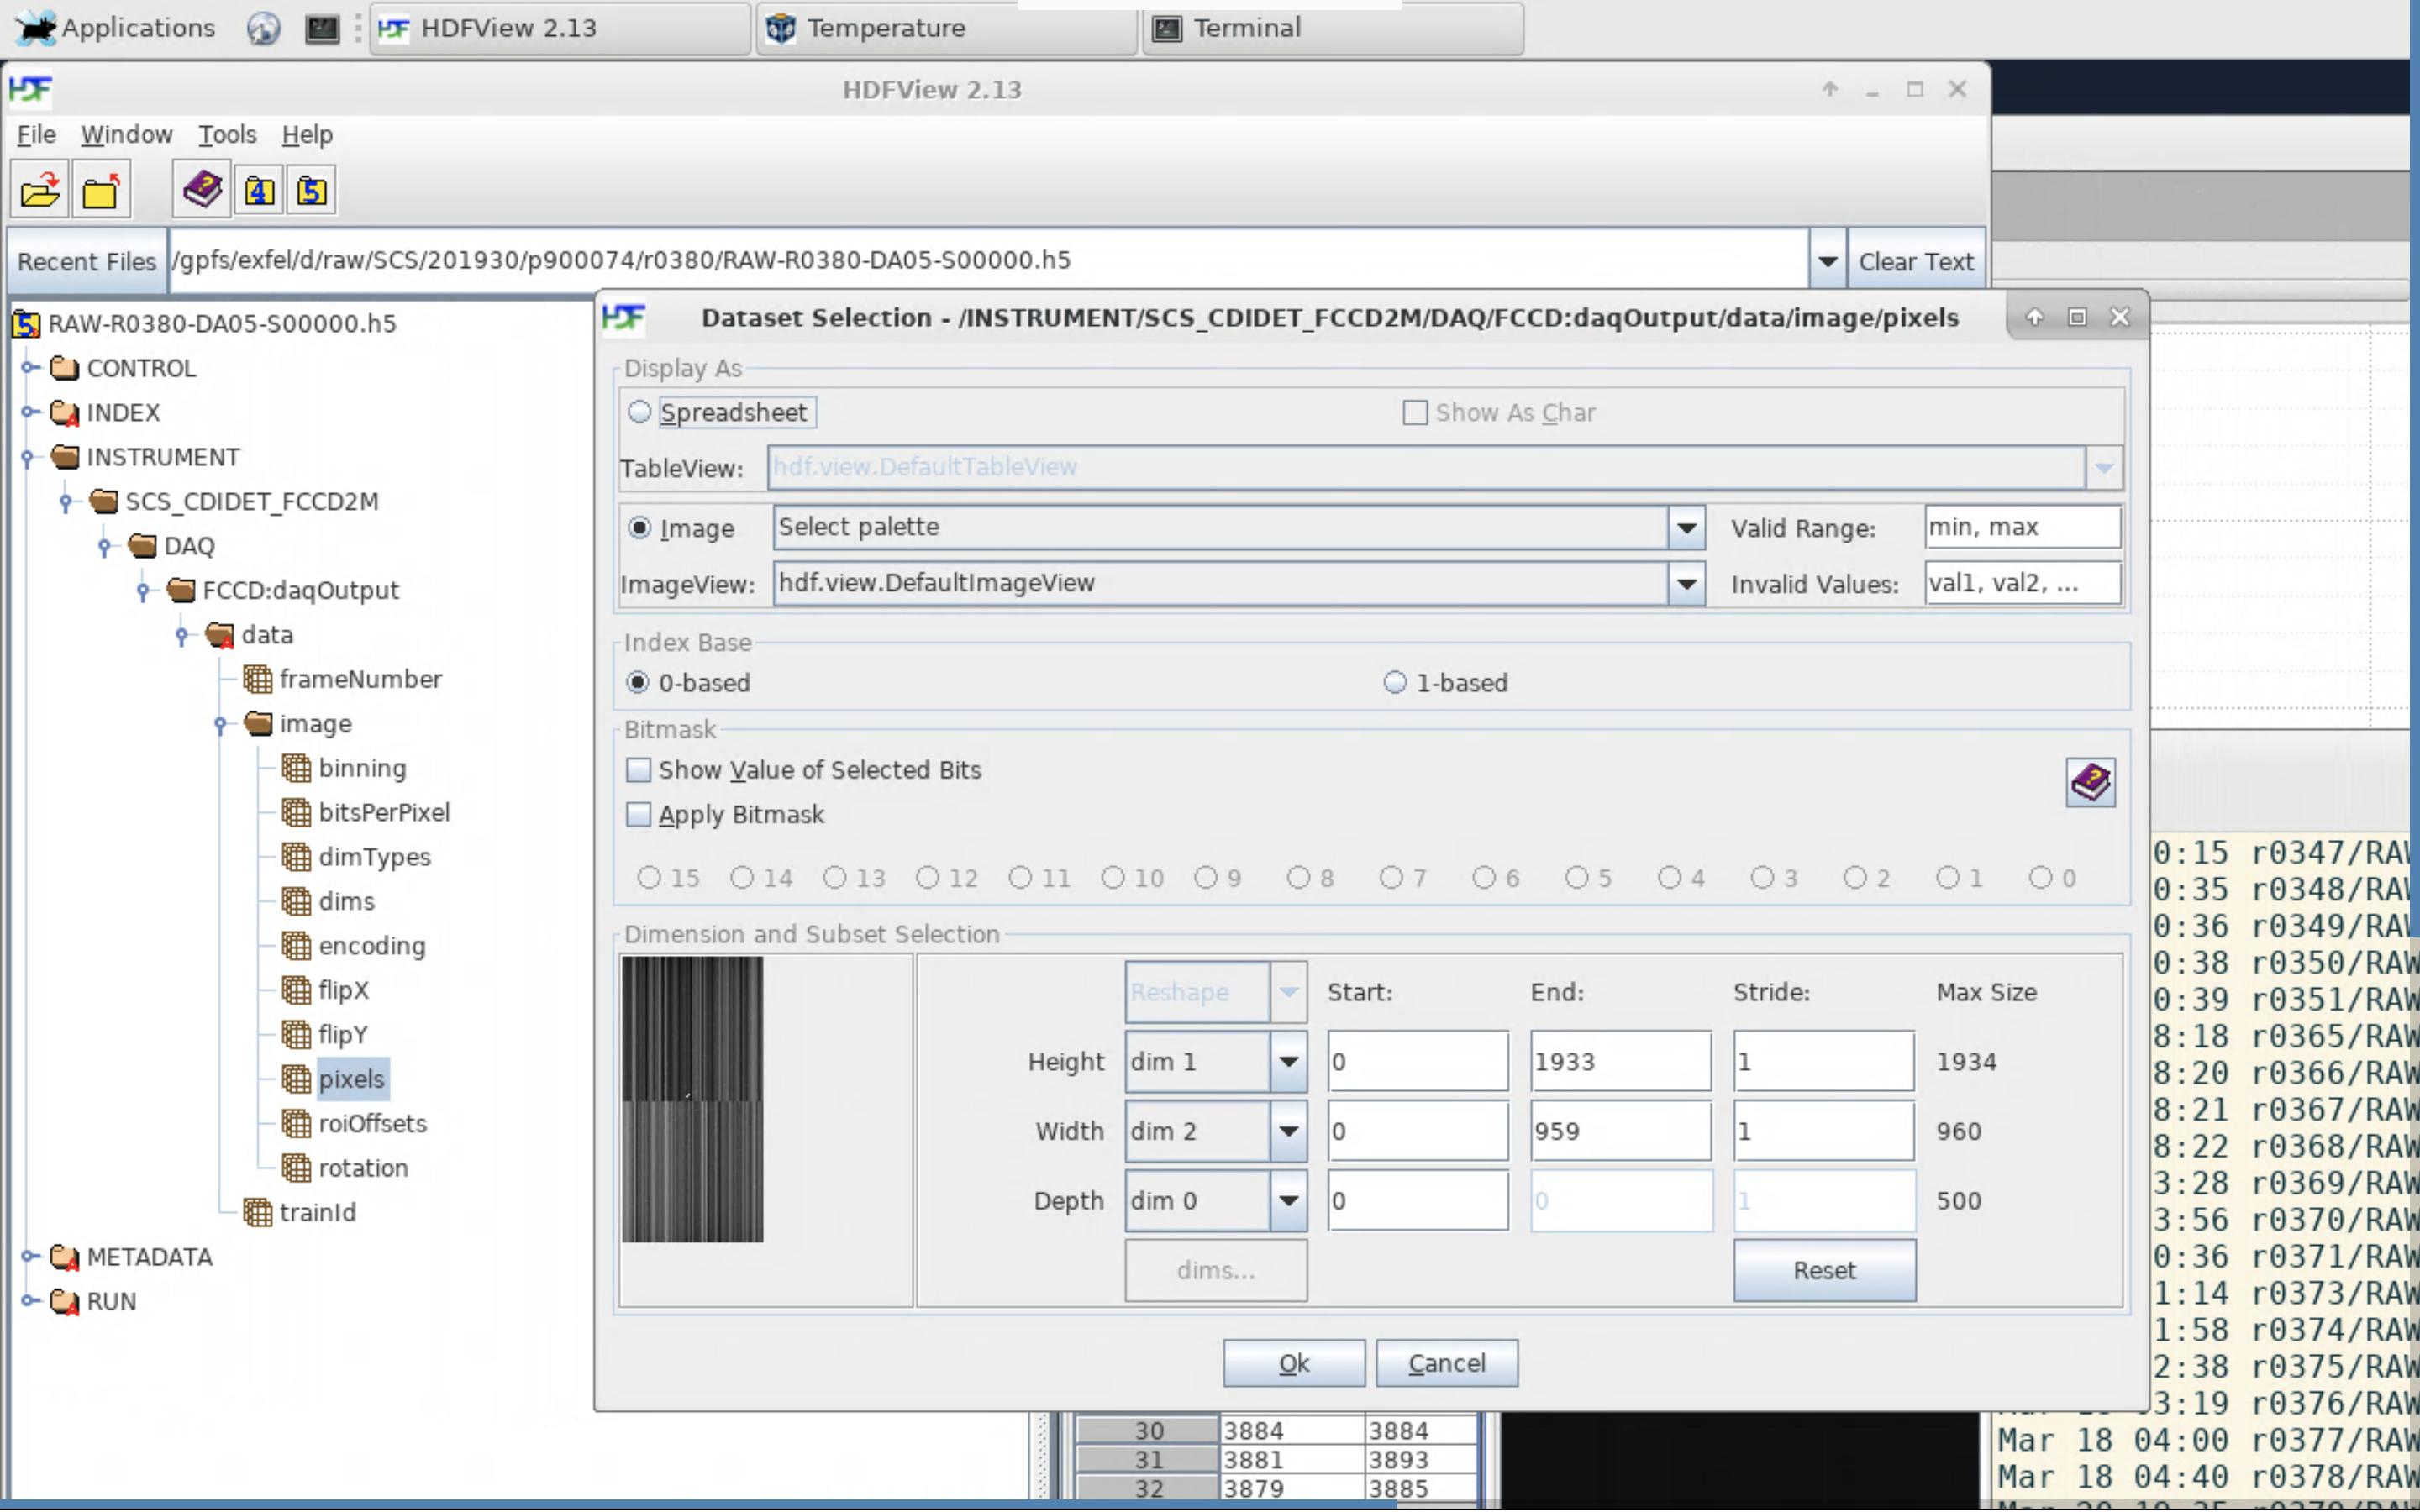
- those starting with CORR contain offset and relative gain corrected data in the “pixels” array (see Figure Fig. 5.4). These files process quite quickly.
- those starting with CORR-D contain additionally common-mode (“pixels”) and charge split corrected data in the “pixels_classified” array, as well as a “pattern array”, which contains event multiplicity.
5.2.3. Accessing the Raw Data
If you need to access the raw data, follow these steps:
- Make sure the SCS beam-line instrument staff have given you the permission to the current proposal. If not, ask them to add your username to the proposal under study.
- Open a terminal and connect to Maxwell cluster (
ssh username@max-exfl)- Go to the directory where the current raw data are being stored. An example is:
/gpfs/exfel/exp/SCS/201930/p900074/raw/r0100, where SCS is the instrument, 201930 the proposal cycle, p00074 the proposal number, and r0100 is the run number 100.- For a specific run number, there should be a few files in that directory. All of them look like
RAW-R0100-DA##-S000##.h5, where DA## refers to the data aggregators and DA05 is for FastCCD and S##### refers to the file sequence. If the DAQ is setup correctly and the connection between DAQ device and data aggregator is established correctly, you should see one or moreRAW-R0100-DA05-S#####.h5files in the directory.- To take a look at what is inside these raw data files, on the terminal type: module load x-ray.
- Open the raw data file structure with this command:
hdfview RAW-R0100-DA05-S00001.h5- Browse to the following array to see the raw image data:
/INSTRUMENT/SCS_CDIDET_FCCD2M/DAQ/FCCD:daqOutput/data/image/pixel(see Fig. 5.4)
To ensure data is being properly written on disk make sure that the “pixel” is non empty and non 0.
To visualize the data right click on pixel, select Open As, select the Image as display type then, in the Dimension box, select Height: dim 1, Width: dim 2, Depth: dim 0.


