Writing documentation with Gitlab IDE
Summary
The overall process consists of 3 parts:
- create a new branch to work on
- make modifications and save them (commits)
- finally, merge the modified branch back to the main master branch (merge)
The steps are detailed below.
I. Creating a new branch
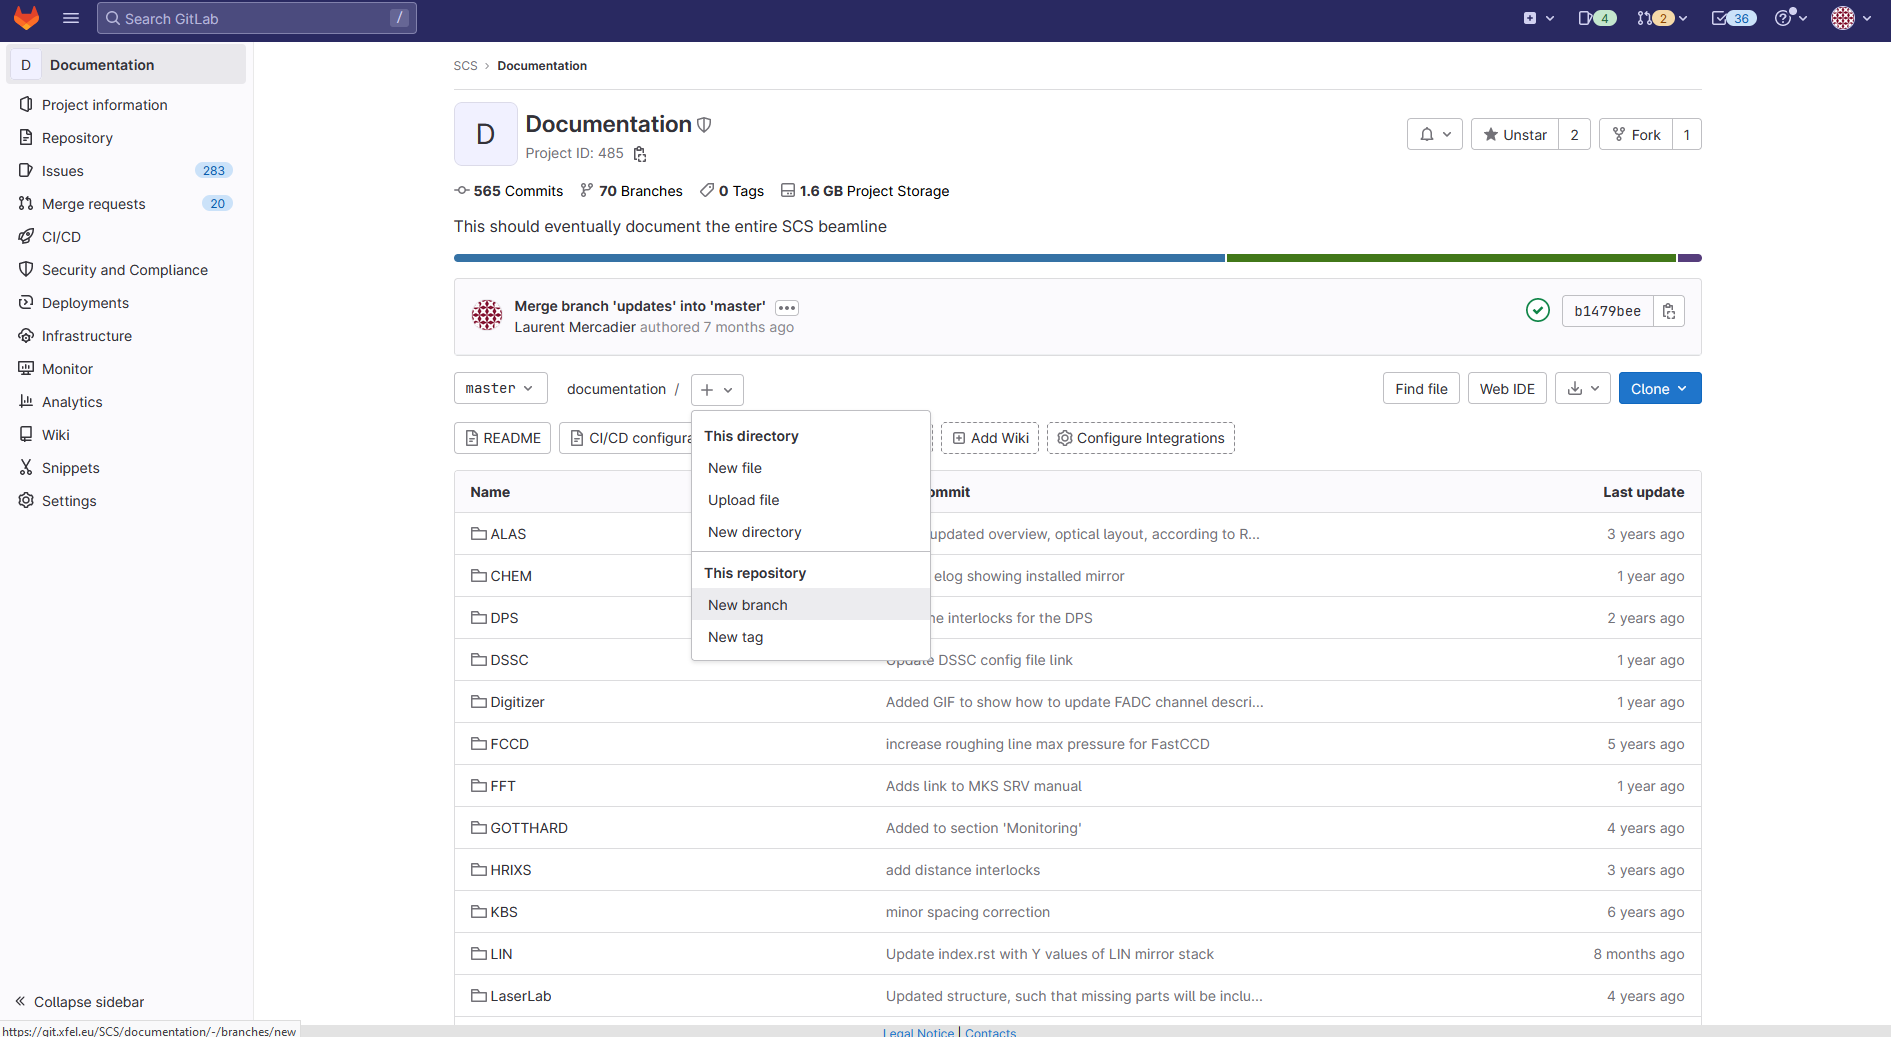
- Go to the documentation project: https://git.xfel.eu/SCS/documentation
- Create a new branch…
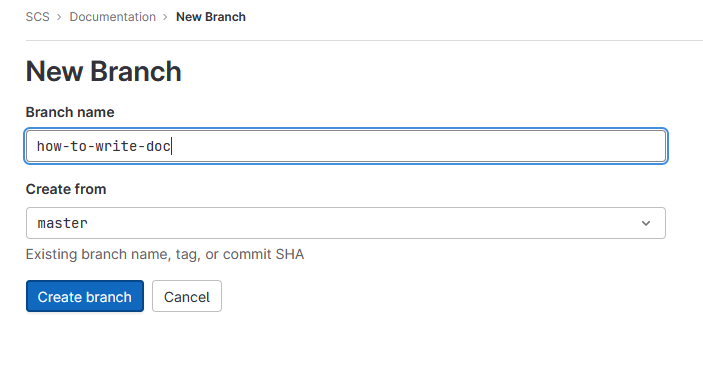
- …with the name of your choice, here ‘how-to-write-doc’.
II. Make modifications (commits)
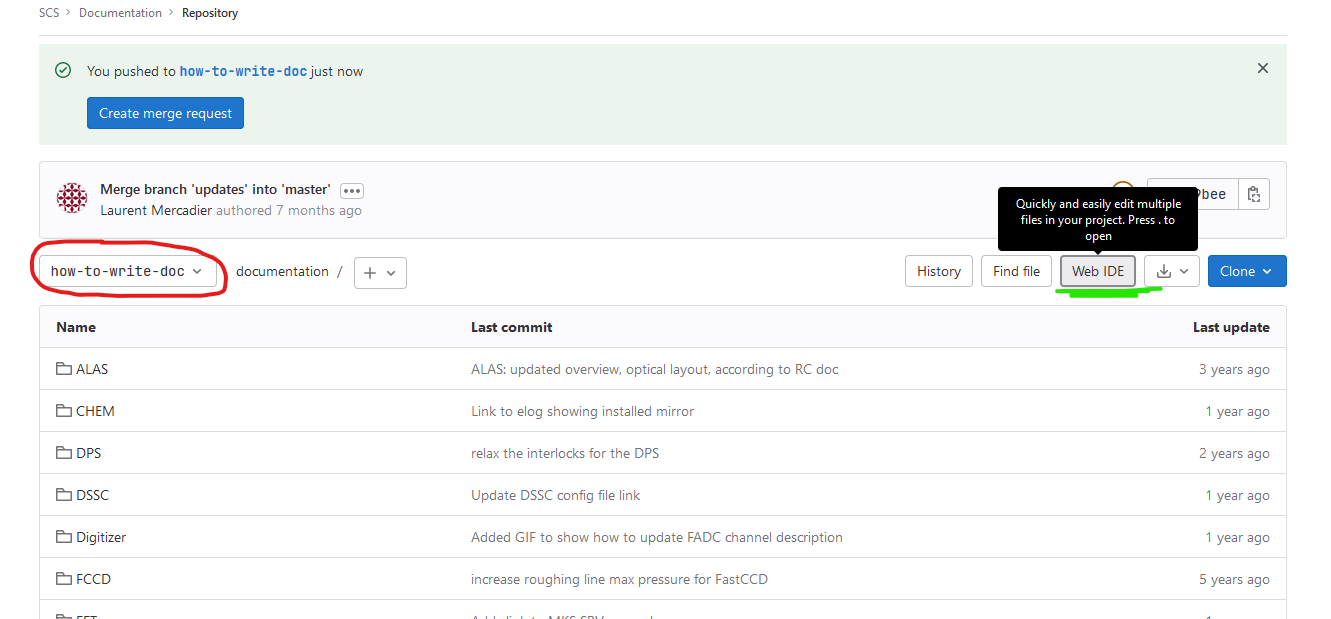
- From the new branch (circled in red), start Gitlab IDE (integrated development environment)
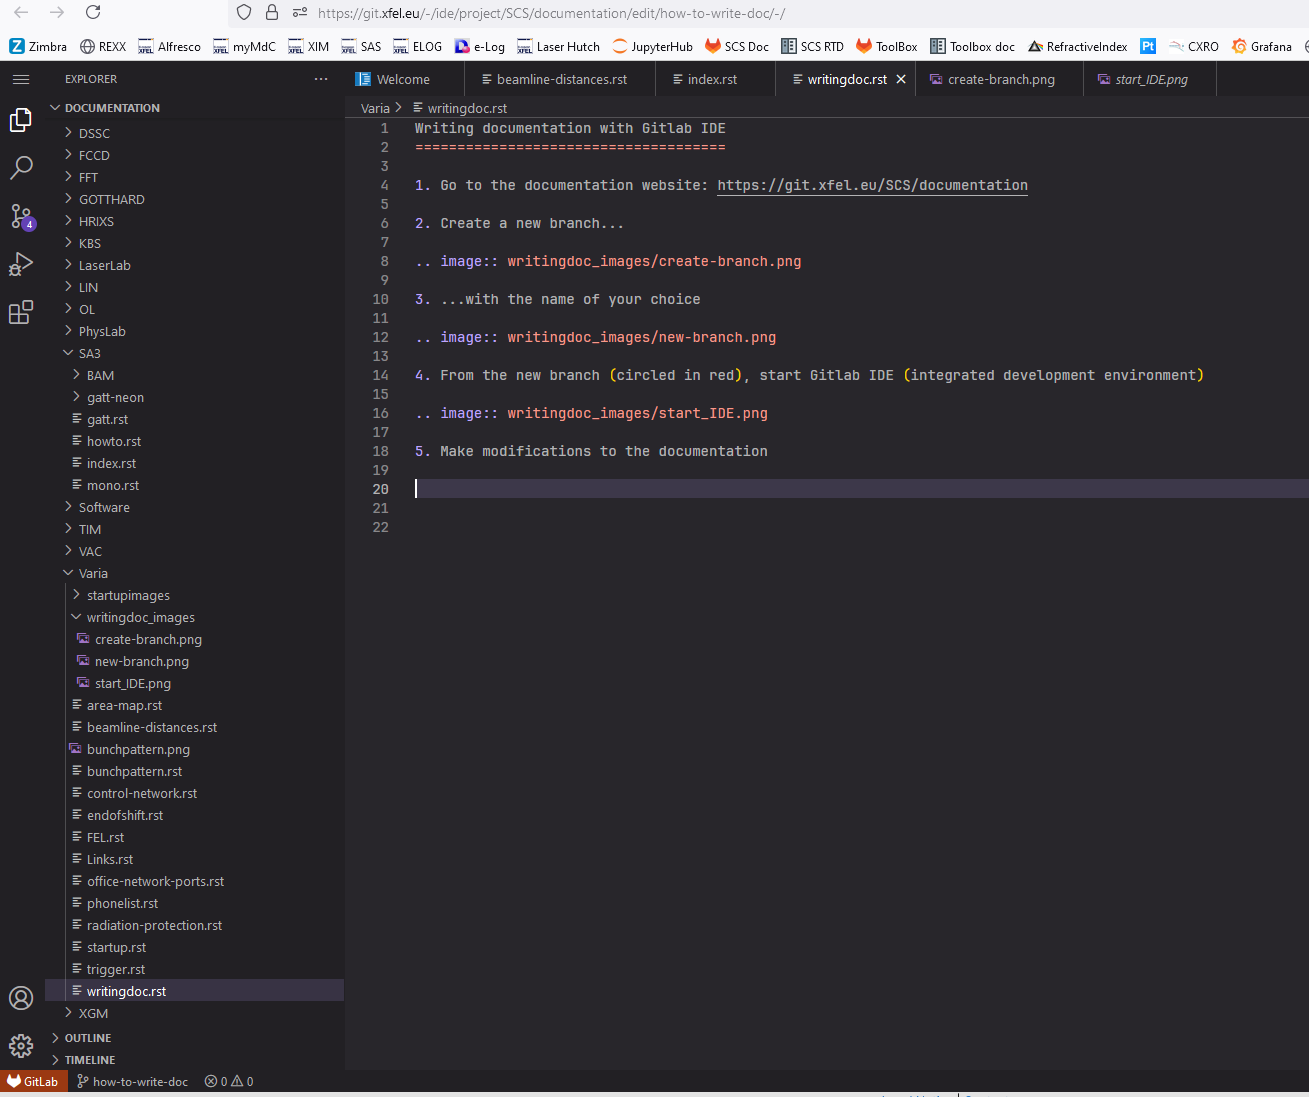
- Make modifications to the documentation
- Click on source control. The number tells how many files were modified.
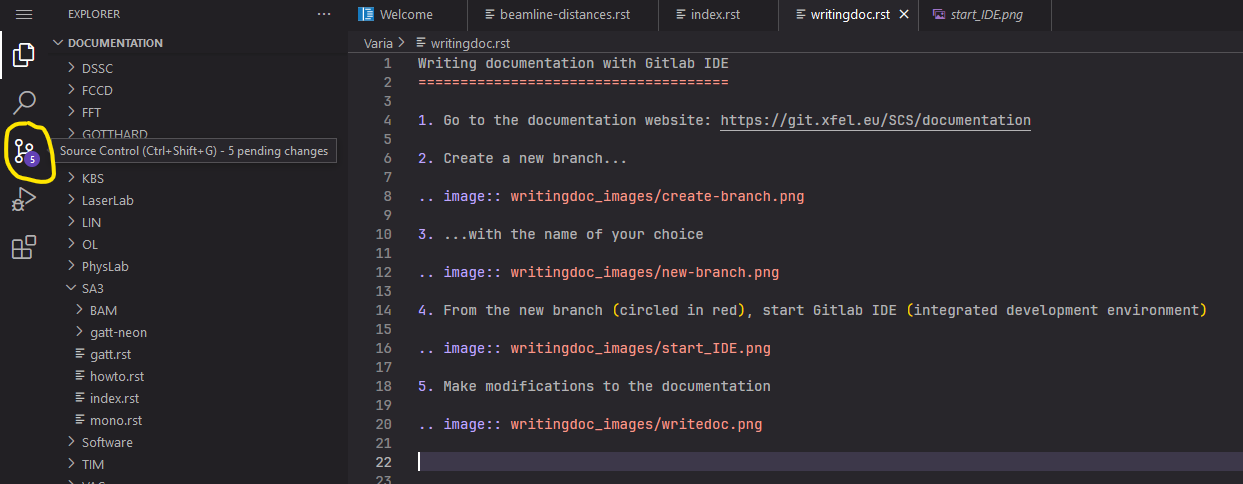
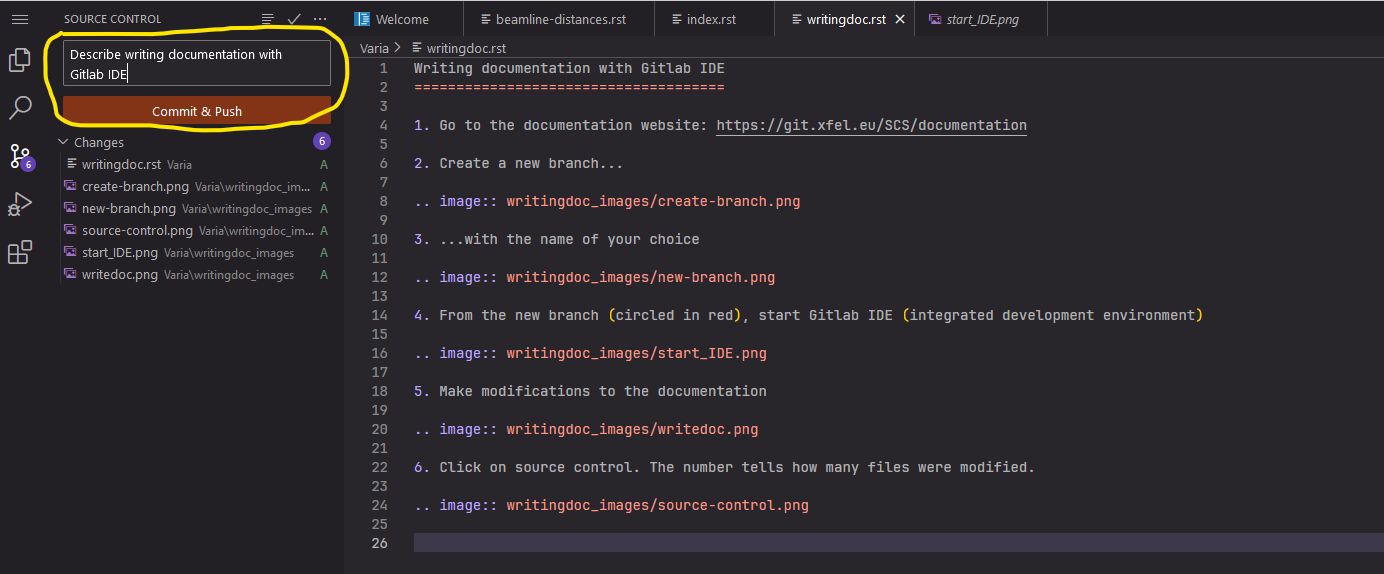
- Commit and push the new changes
- Select branch. In principle one could part I. and enter the new branch name at this stage. Since we already created a new branch, we select it.

III. Merging
- Go back to the documentation project and create a merge request
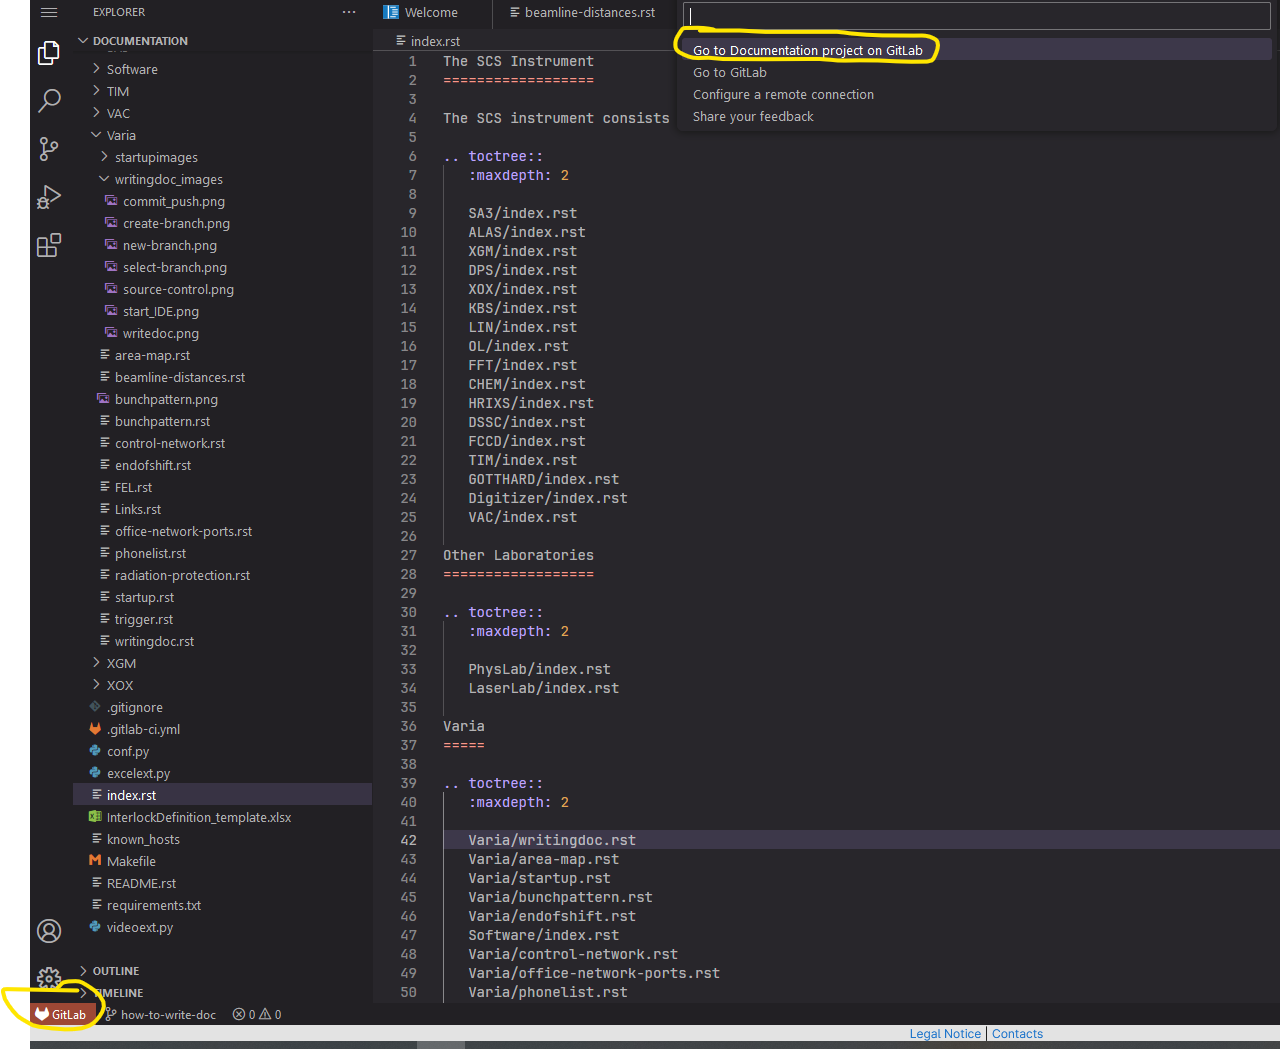
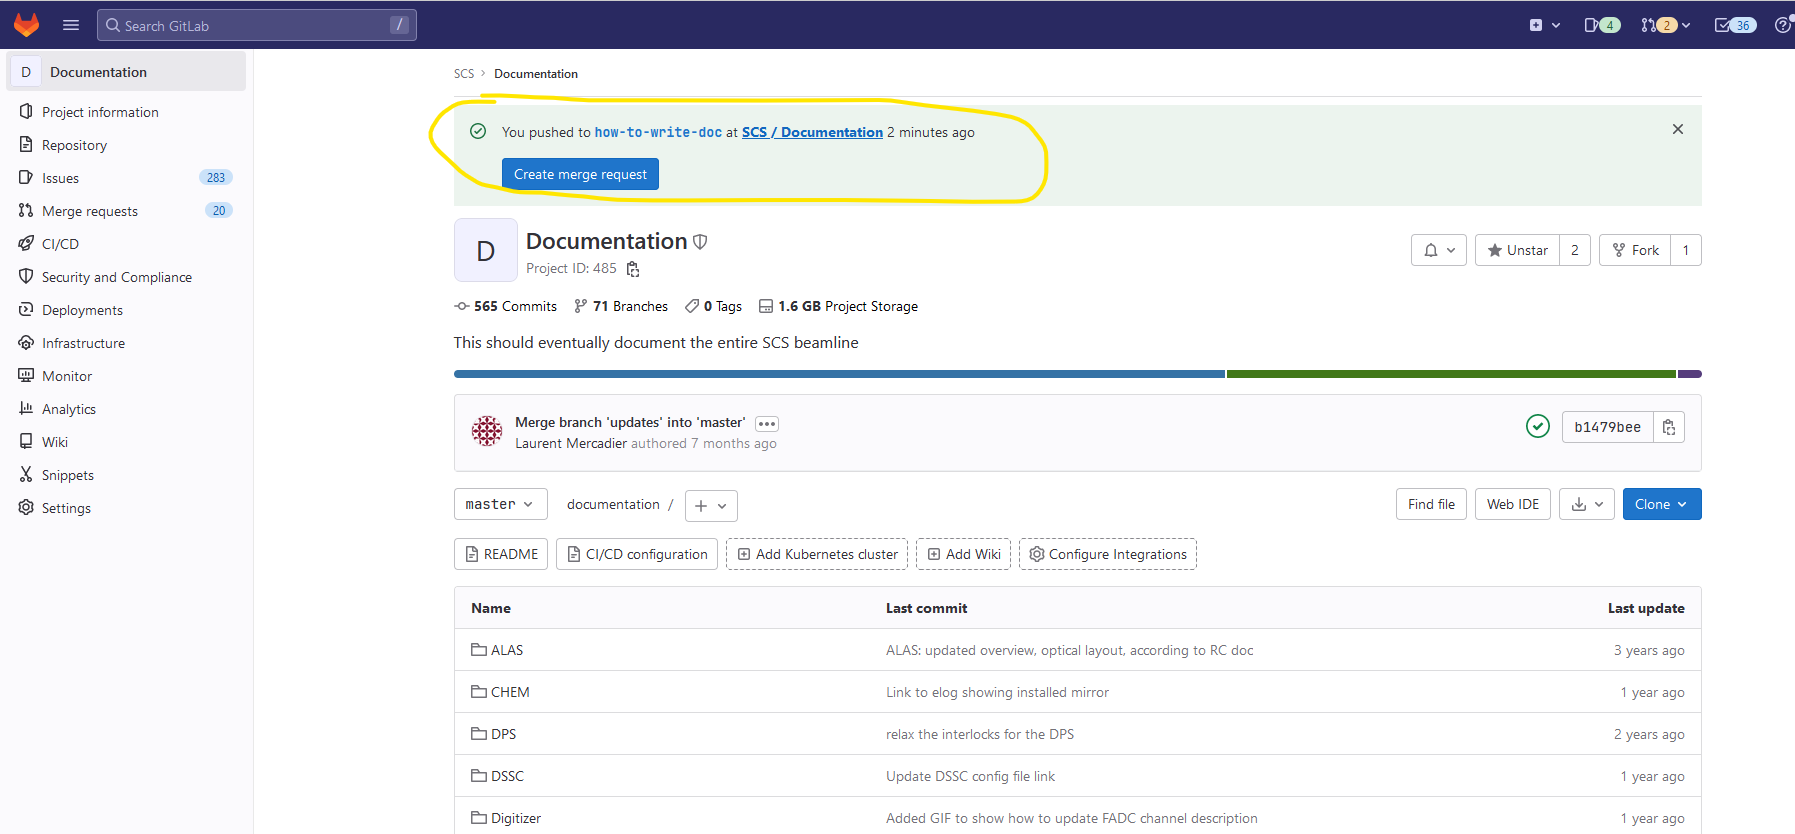
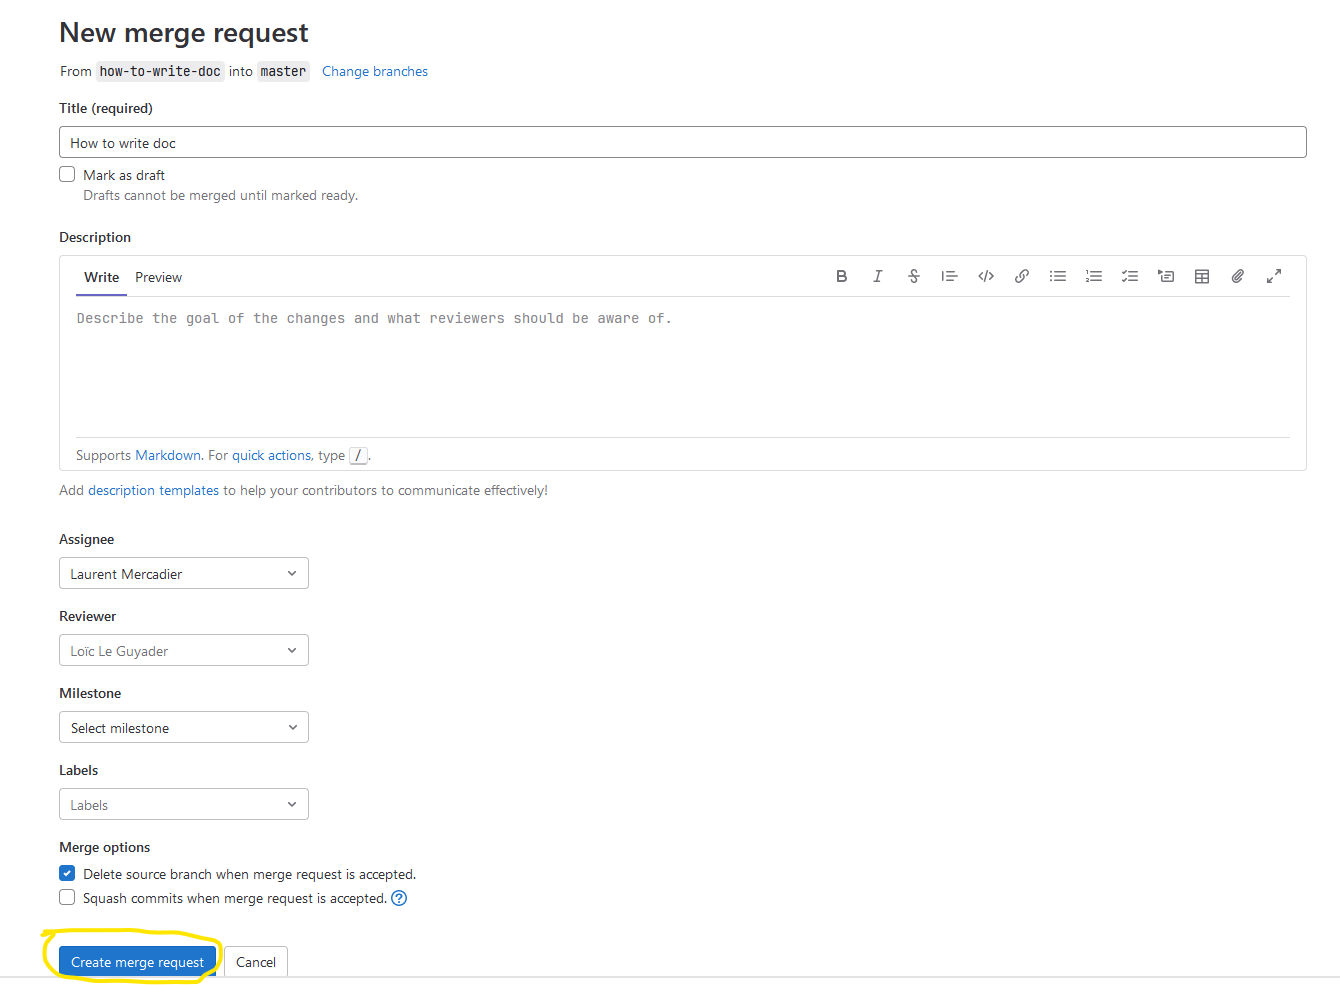
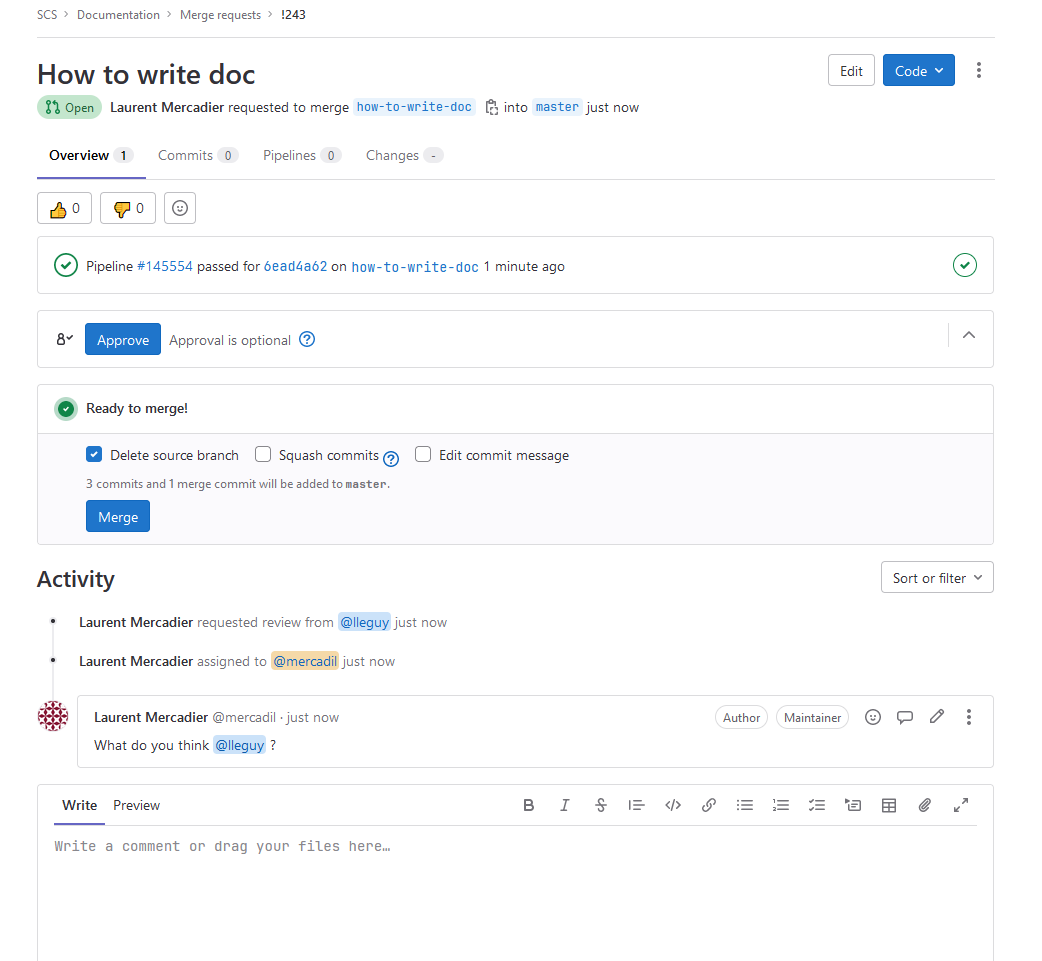
- Ask colleagues to review the changes, and once satisfied, push on “Merge”
- If you need to make more changes, from the documentation project, select the branch you want to work on, launch the IDE and follow part II. again.